REVIEW · BANGKOK
Bangkok Photography Masterclass – Private Photography Lesson
Book on Viator →Operated by Aperture Tours · Bookable on Viator
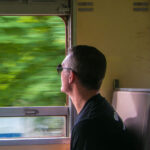
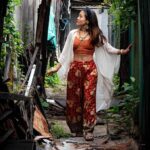
Bangkok at night is a camera workout. This private photography masterclass is built for real practice, with a local instructor steering you through classic Bangkok scenes like Chinatown and Wat Arun while you learn how to see better and shoot smarter. You can choose a daytime or nighttime version, which matters because the city changes fast after dark.
I especially love that it’s customized to your skill level. That means you spend the 3 hours actually working on your photos, not just watching someone else take pictures. You also get free bottled water, which sounds small until you’re walking under Bangkok sun or shooting through humid evening streets.
One thing to consider: there’s at least one recorded case of a last-minute cancellation due to instructor illness. If this is your very last afternoon in Bangkok, I’d keep a backup plan for photography.
In This Review
- Key highlights you’ll feel right away
- How the lesson actually sharpens your photos in Bangkok
- Day vs night: choosing the Bangkok that matches your camera mood
- Daytime photography in Bangkok (where structure matters)
- Night photography (where light and motion do the teaching)
- Chinatown and Erawan Shrine: learning to frame story, not just scenes
- Benjasiri Park and Wat Arun: switching gears between calm and icons
- Sao Chingcha (Giant Swing): where scale and symmetry meet
- Train Night Market Ratchada and So/ Spa: night lighting you can learn from
- What the route is really doing for your skills (beyond checklists)
- Getting started at Rong Mueang: keeping the day from slipping away
- Price and value: is $160 a fair deal for a private 3-hour lesson?
- Who should book this masterclass in Bangkok
- Should you book this Bangkok Photography Masterclass?
- FAQ
- Is this a private photography lesson?
- How long is the Bangkok Photography Masterclass?
- Can I choose a daytime or nighttime tour?
- What places are included in the experience?
- Is bottled water included?
- Where do we meet for the tour?
- Does the tour end at the same meeting point?
- What kind of ticket do I get?
- What is the cancellation policy?
- Are service animals allowed?
Key highlights you’ll feel right away
- Private, flexible coaching for your pace and your gear comfort
- Day or night format so you can practice what you actually want to shoot
- Local instructor guidance with practical composition feedback (Paul is a standout guide)
- Iconic Bangkok photo stops from Chinatown to Wat Arun and Sao Chingcha
- Night-market lighting practice in areas like Train Night Market Ratchada
- Free bottled water to help you stay focused on shooting
How the lesson actually sharpens your photos in Bangkok
This isn’t a lecture-heavy tour where you collect pretty views and hope they turn into better pictures later. The value here is the coaching mindset: you’re in motion, you’re shooting, and your instructor is giving direction you can use right away. With a private setup, you’re not stuck waiting for a camera turn or guessing what someone else did with their settings.
For me, the biggest win is composition as a skill, not a lucky accident. In the feedback I saw, Paul specifically focused on helping people improve composition and overall shooting skills. That’s exactly what you need in a city like Bangkok, where there’s so much to photograph that it’s easy to point the lens at everything and end up with nothing that feels intentional.
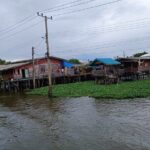
The second big plus is that you’re working with a local photography instructor, which typically means you’re not only chasing landmarks. You’re also learning how to frame real street life, how to handle busy streets, and how to find shots that feel Bangkok instead of tourist-copy-paste.
Your main limitation is time: it’s about 3 hours. That’s enough for meaningful progress, but you won’t master every camera trick in a single evening. Think of it as a focused “skills jump-start,” then you go practice on your own afterward.
You can also read our reviews of more private tours in Bangkok

Day vs night: choosing the Bangkok that matches your camera mood
You’ll get the option to do this lesson in a daytime or nighttime style, and that choice changes what you’re learning.
Daytime photography in Bangkok (where structure matters)
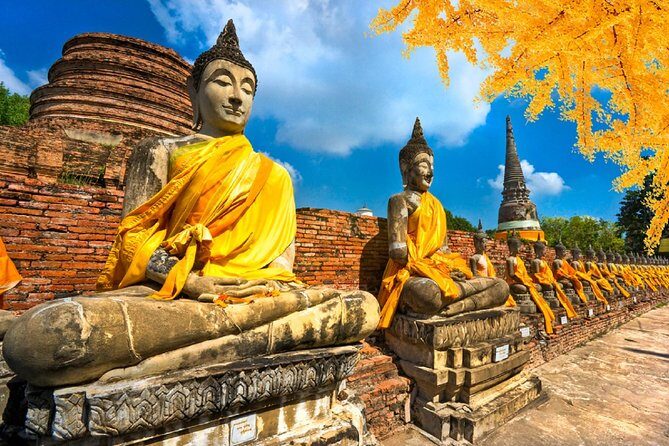
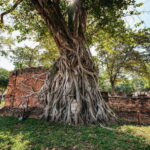
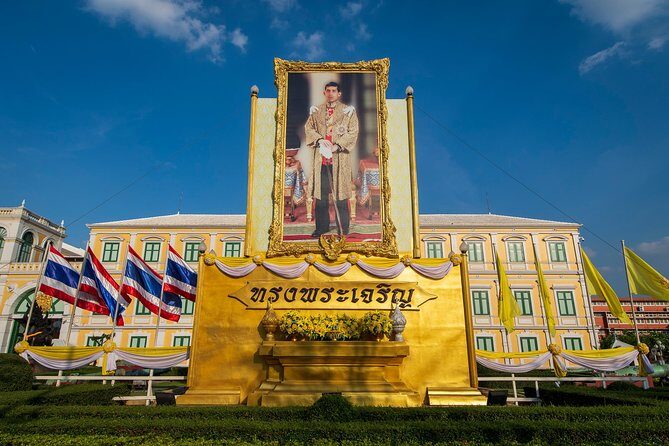
During the day, the city offers cleaner visibility and more predictable light. You’ll spend time in areas that include historic and cultural landmarks, plus neighborhoods like Chinatown. Day shooting is ideal if you want to practice:
- building strong frames with clear subjects
- managing contrast between buildings, signage, and crowds
- photographing famous shapes with less chaos than at night
You also get the chance to practice your eye around parks and shrines, not just street corners. That balance can be helpful if you feel stuck shooting only close-up street scenes.
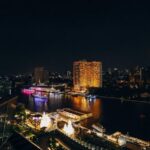
Night photography (where light and motion do the teaching)
The nighttime version leans hard into Bangkok’s lights and energy. The goal isn’t only to make night photos; it’s to learn how to handle night conditions so your shots don’t turn into blurry, muddy frames. In this format, the route circles areas tied to nightlife and night markets, so you’ll see lots of street lamps, neon-style lighting, and activity you can’t exactly control.
If you pick the night option, your coaching tends to shift toward:
- capturing motion without losing your subject
- using light sources creatively
- handling bright highlights and dark shadows
And yes, the city really does feel different after dark. The practical part is that night photography rewards the way an instructor helps you decide what to shoot, not just how.
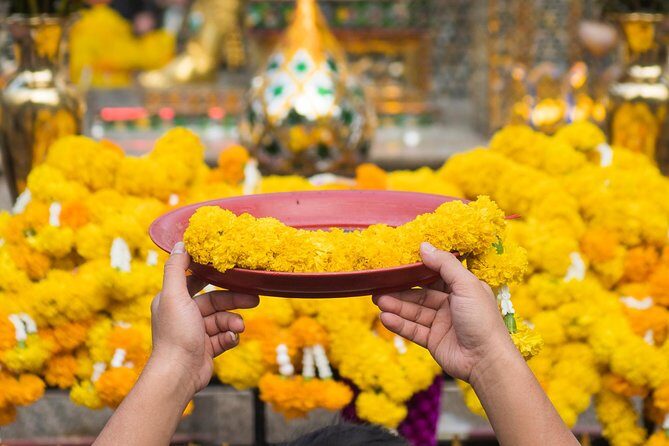
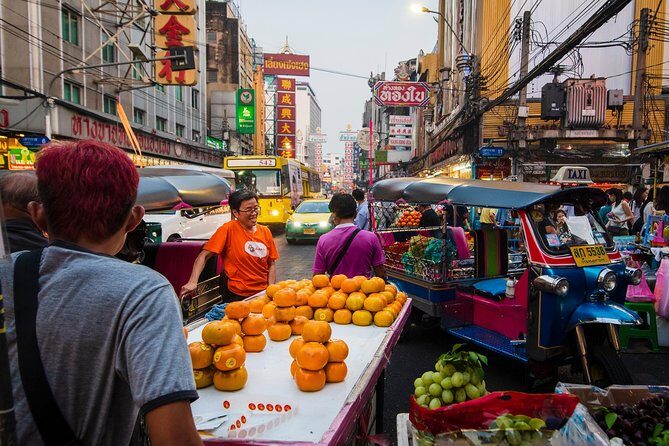
Chinatown and Erawan Shrine: learning to frame story, not just scenes
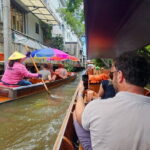
A big part of the value is starting in a place that forces you to practice fast. Chinatown is full of visual cues—signs, textures, people, and small moments that can become great photos if you frame them well. The coaching here is about helping you pick a subject and then simplify your composition so your image has a clear point.
What you’ll like about this stop:
- you get a chance to shoot “busy” without giving up
- you learn to build a frame when there are many tempting distractions
- you practice creating depth through layers of street detail
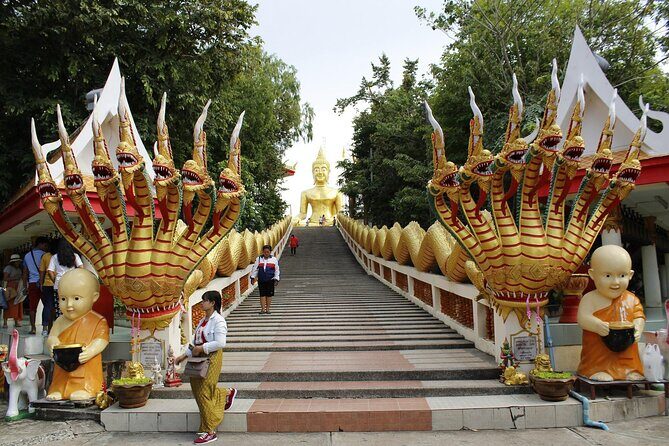
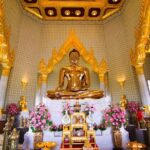
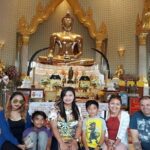
Then you move on to Erawan Shrine (also called the Thao Mahaprom Shrine). This stop is useful because it gives you a different type of subject than typical street scenes. Shrines bring symbolism, color, and a sense of place. For your photos, it’s a lesson in how to photograph a site respectfully while still finding strong angles and details.
A possible drawback at these stops: crowds and movement can make it harder to get a perfectly clean shot. That’s not a problem if your instructor is helping you work around it. It’s a problem only if you expected long, quiet photo time.
You can also read our reviews of more photography tours in Bangkok


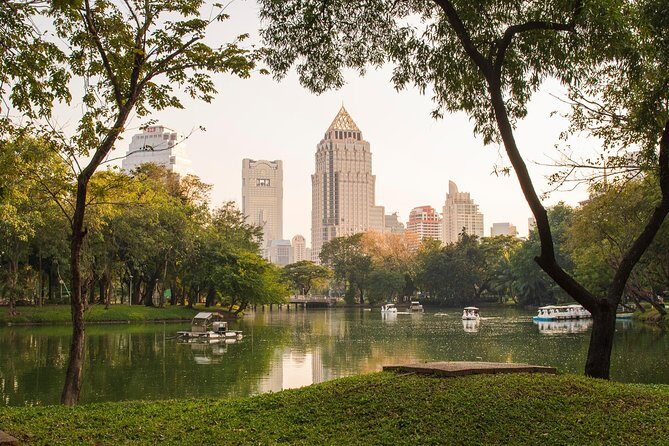
Benjasiri Park and Wat Arun: switching gears between calm and icons
After Chinatown and the shrine, the tour includes Benjasiri Park. I like this kind of stop because it gives you a mental reset. Even if it’s still active, parks and open areas often help you practice:
- cleaner backgrounds
- subject isolation
- calmer compositions compared to tight streets
From a photography standpoint, this is where you can experiment. Your instructor can help you test framing ideas without the same level of visual clutter. If you’re the type who freezes when there are too many options, this pause can be the thing that makes the rest of your photos click.
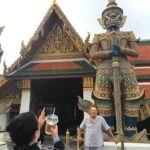
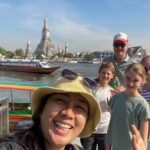
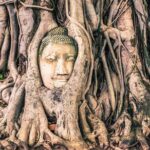
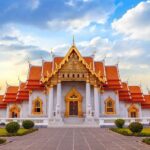
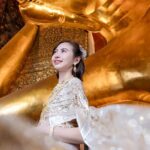
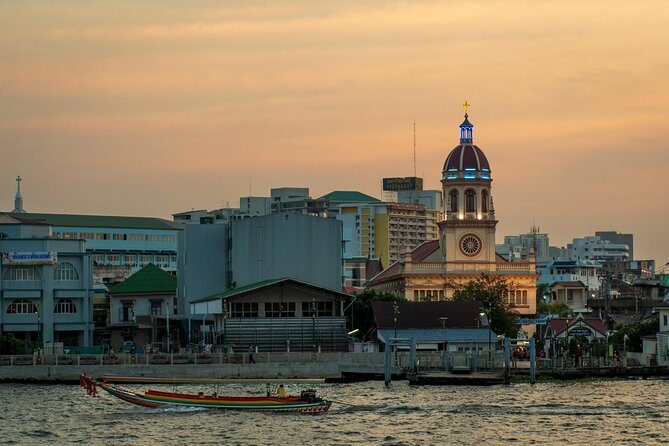
Next comes Temple of Dawn, Wat Arun. This is one of Bangkok’s signature landmarks, and it’s the kind of place where composition lessons become real. You’ll likely spend time focusing on shapes, lines, and perspective. It’s also a location where timing matters; small changes in angle can completely change the look of your final image.
The coaching value here is to avoid photographing Wat Arun like a postcard. Instead, you practice how to make your photo feel like you were there:
- choosing a tighter framing versus showing everything
- using your position to shape the subject
- controlling what you include at the edges of the frame
Sao Chingcha (Giant Swing): where scale and symmetry meet
Sao Chingcha, the Giant Swing, is another Bangkok icon that’s great for teaching the basics of strong photography geometry. The structure encourages you to think about alignment and symmetry, but your job is to make it interesting, not just centered.
This stop is where you can practice:
- how to handle a tall subject in a crowded context
- finding lines that lead the eye
- keeping your frame clean when the scene is visually intense
Because it’s an iconic landmark, it’s easy to overshoot on wide shots. Your instructor’s guidance helps you decide when to go wide and when to go more detailed, so the photo doesn’t become a general view with no personal voice.
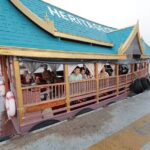
Train Night Market Ratchada and So/ Spa: night lighting you can learn from
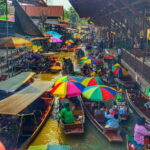
If you choose the night format, you’ll spend time around Train Night Market Ratchada. Night markets are the perfect teaching ground because the lighting is dramatic and inconsistent. You’ve got bright sign-like light, shaded corners, and people moving in and out of the scene. That combination is hard to photograph on your own, which is exactly why coaching helps.
In practical terms, night-market shooting teaches you how to:
- balance bright lights and darker subjects
- keep your image sharp enough to tell a story
- deal with motion blur intentionally instead of by accident
A later stop in the nighttime route includes So/ Spa. I can’t promise what you’ll see there day-to-day, but photo-wise this kind of location often gives you opportunities to experiment with light, reflections, and subject isolation in a way street-only stops don’t.
If you’re hoping for night photos that look intentional, not just “lit,” this part of the lesson is where you’ll feel the shift. You’re not guessing; you’re learning a method for choosing your shot under tough conditions.
What the route is really doing for your skills (beyond checklists)
Even though the stops sound like a mix of famous names and neighborhoods, the route has a training logic. You’re covering:
- street intensity (Chinatown)
- symbolic detail (Erawan Shrine)
- calmer framing practice (Benjasiri Park)
- major landmark composition (Wat Arun, Sao Chingcha)
- night lighting and motion (Train Night Market Ratchada)
That variety matters because it stops you from developing one photo habit. Many people get good at one style and then feel helpless when the light or the subject changes. This lesson pushes you to adapt on the move.
And the coaching tone seems to be hands-on. The feedback I saw praised Paul’s enthusiasm, with concrete tips and help that led to better shots. That’s the kind of teaching that turns a camera from a device you operate into a tool you use.
Getting started at Rong Mueang: keeping the day from slipping away
You meet at สถานีรถไฟหัวลำโพง (Rong Mueang) in Pathum Wan, and the tour returns to the same meeting point. This is helpful because you’re not forced into complicated end-of-tour logistics. You can also plan your day around a clear start and finish.
It’s also marked as near public transportation, which is useful in Bangkok, where timing can make or break your day. For a photo lesson, arriving a little early gives you time to settle, test settings, and get your head into shooting mode before you start walking.
Price and value: is $160 a fair deal for a private 3-hour lesson?
At $160 per person for about 3 hours, this sits in the “private coaching” category rather than a group sightseeing price. The value comes from what you get during that time:
- private attention for only your group
- a local instructor who can tailor guidance to your skill level
- practice in real Bangkok locations, including night-market lighting scenarios
- free bottled water, so you stay comfortable enough to keep shooting
You’ll also see group discounts available. If you’re traveling with friends who also want photography improvement, the per-person value gets better.
One more practical value point: this tends to be booked about 9 days in advance on average. That usually means you’ll do best booking ahead rather than relying on last-minute availability.
If you’re the kind of person who likes to learn by doing, and you want someone to correct your composition choices in real time, $160 can feel like a solid investment. If you want a low-effort walk with only scenic stops and no active coaching, you may find the cost doesn’t match your expectations.
Who should book this masterclass in Bangkok
This is a strong fit if you:
- want a photography upgrade without guessing where to go
- like walking routes with clear photo targets
- are interested in both day and night styles
- want personalized instruction rather than group pacing
It’s also listed as something most people can participate in, and it’s a private activity, meaning only your group joins you. Service animals are allowed as well, which matters for some travelers.
If you’re an absolute beginner, you’ll benefit most by using the lesson to build a baseline: how to choose your subject, frame it, and react to light. If you already know your camera, you’ll still likely appreciate the composition and scene-choices coaching, since Bangkok makes it easy to get overwhelmed.
Should you book this Bangkok Photography Masterclass?
I’d book this if you want a practical, coached way to photograph Bangkok instead of just sightseeing with a camera. The combination of private instruction and a mix of Chinatown, major icons like Wat Arun and Sao Chingcha, plus night-market lighting practice gives you a full set of situations to learn from in one go.
I’d hesitate only if this is your last day and you can’t tolerate schedule risk. The data includes at least one last-minute cancellation due to instructor illness, so treat it like a real activity with a possible hiccup. If you can build a backup plan, you’ll likely enjoy the coaching style and walk away with better shots and better habits.
If you’re ready to trade aimless clicking for guided practice, this is a very strong choice.
FAQ
Is this a private photography lesson?
Yes. It is a private tour/activity, so only your group will participate.
How long is the Bangkok Photography Masterclass?
The experience lasts about 3 hours.
Can I choose a daytime or nighttime tour?
Yes. You can choose from daytime or nighttime options.
What places are included in the experience?
The route can include Chinatown, Erawan Shrine (Thao Mahaprom Shrine), Benjasiri Park, Temple of Dawn (Wat Arun), Sao Chingcha (the Giant Swing), Train Night Market Ratchada, and So/ Spa.
Is bottled water included?
Yes. Bottled water is included.
Where do we meet for the tour?
You start at สถานีรถไฟหัวลำโพง (Rong Mueang), Pathum Wan, Bangkok 10330, Thailand.
Does the tour end at the same meeting point?
Yes. The activity ends back at the meeting point.
What kind of ticket do I get?
You receive a mobile ticket.
What is the cancellation policy?
Free cancellation is available. You can cancel up to 24 hours in advance for a full refund.
Are service animals allowed?
Yes, service animals are allowed.